ERPNext Booking & Reservation Management helps businesses accept online reservations directly through their website. Customers can choose a reservation date, time slot, plan, and number of guests before placing an order.
ERPNext Booking & Reservation Management allows businesses to create reservation services with price, duration, capacity, images and website details. It also helps manage booking calendars, available slots and booking plans from one place.
All reservation information is connected to the ERPNext online store, quotes, sales orders and reservation records. This makes it easier to manage reservations and organize reservation data.
- Create and manage reservation products directly from ERPNext.
- View reservation services on the website for online reservations.
- Configure reservation days, time slots, prices and capacity.
- Allow customers to select a booking date, time slot, plan, and number of guests.
- Avoid overbooking by validating location availability and capacity.
- ERPNext Booking & Reservation Management connects reservation products to ERPNext online store records.
- Record booking details in quotes and sales orders.
- Automatically create reservation records after order confirmation.
- Allow customers to view their reservations through the customer portal.
- Track booking performance using reports and dashboards.
1. After purchasing the application from the Webkul store, you will receive a link to download the ZIP file of the module.
2. Extract the downloaded ZIP file and you will see a folder named “erpnext_booking_&_reservation_management”.
3. Configure the module in your Git repository.
4. If the application is hosted on GitHub, retrieve it using the command:
bench get-app –branch main
(Replace “main” with your branch name and replace “HTTPs URL” with the URL of your HTTPS clone.)
5. Install the application on your site using the command:
bench –site <your-site_name> install-app erpnext_booking_&_reservation_management
6. Finally, run the “bench migrate” command to complete the installation.
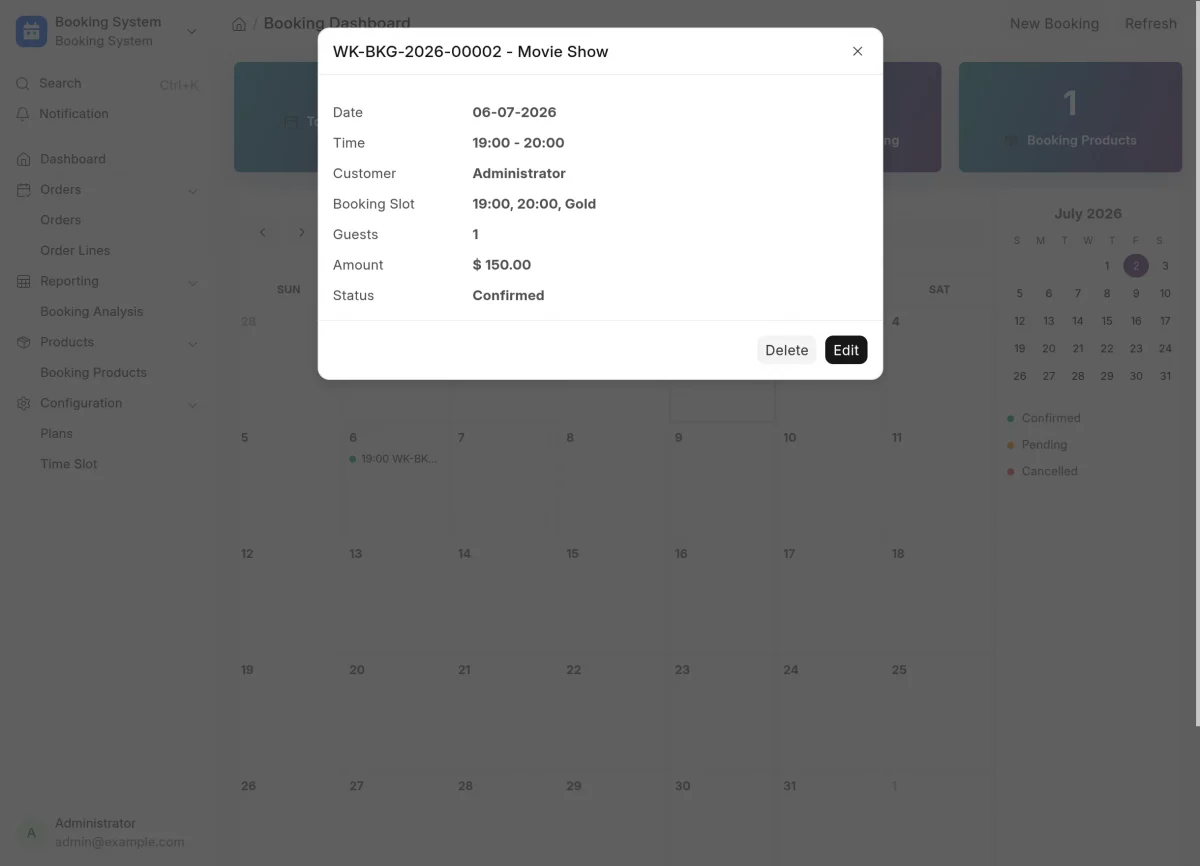
1. First, navigate to the ERPNext Reservation and reservation management module from the ERPNext backend by clicking on Reservation system. This will open the main dashboard, where you can see an overview of all bookings and reservations and access the module’s features.
2. You can also view the booking details for a specific day by clicking on the desired date in the field calendar on the main dashboard. This allows you to quickly check all reservations and reservations scheduled for that day.
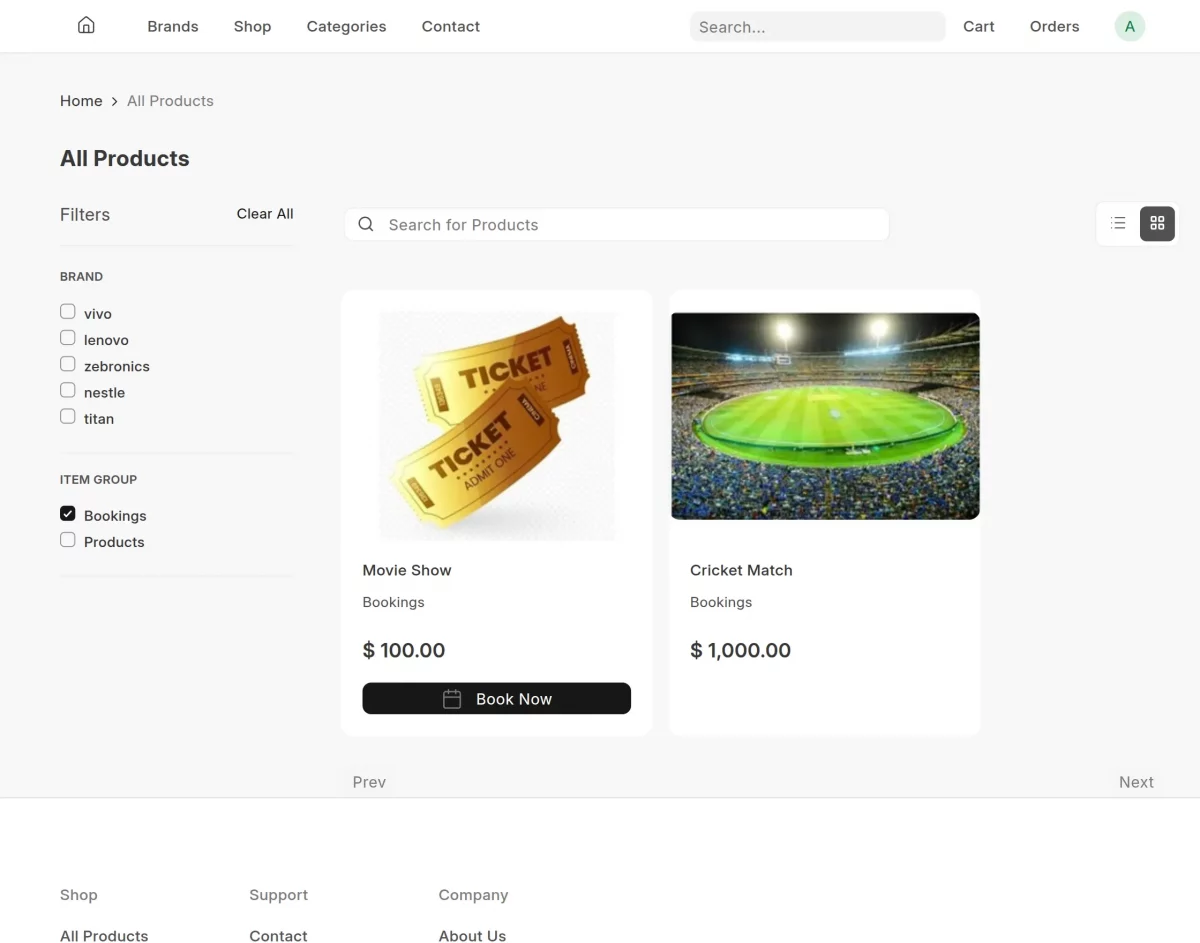
1. On the Online storeCustomers can search and filter available booking services based on their preferences. The page displays all available booking plans, making it easy to search and select the desired booking.
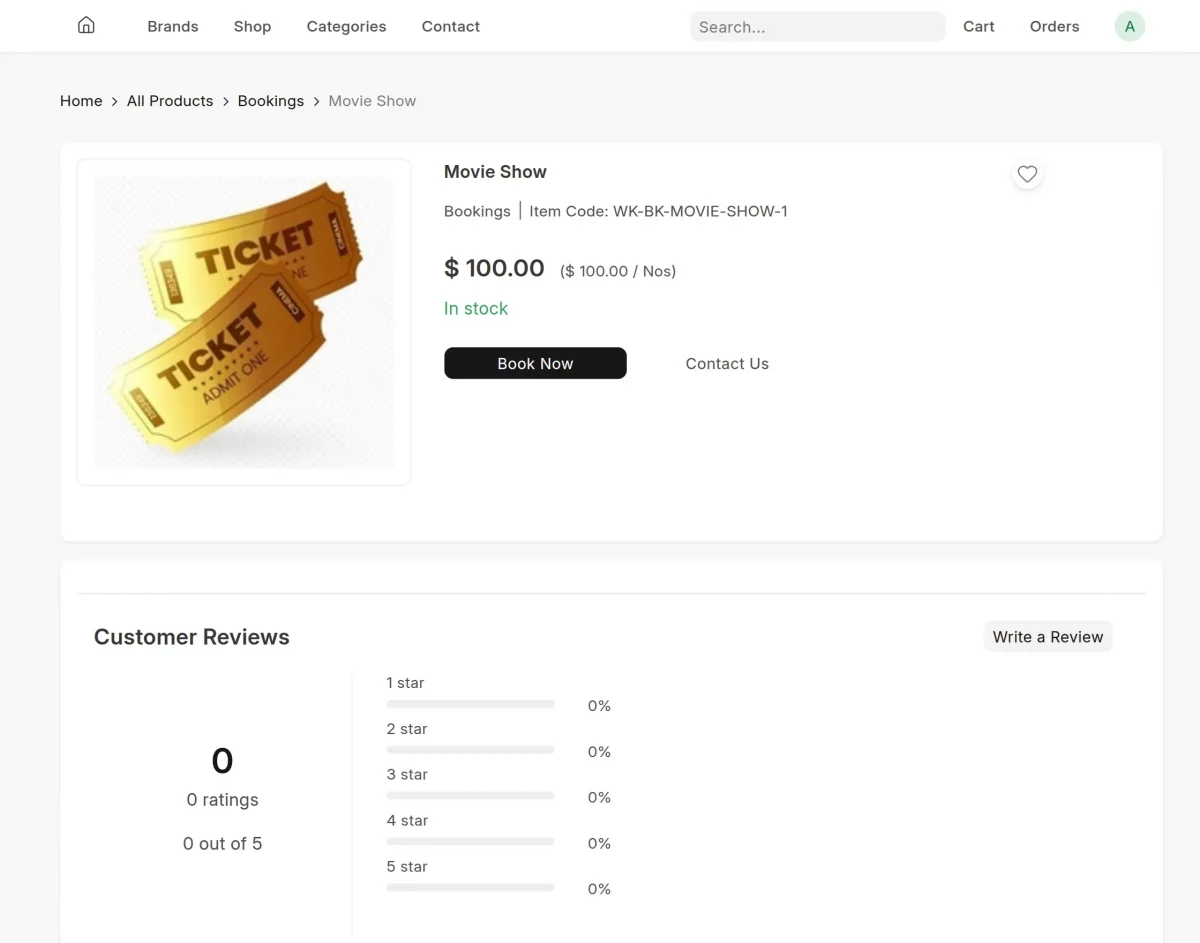
2. To make a reservation, click on the reservation product you wish to book. This will open the product page, where you can see its details, such as description, available booking plans, prices, and other booking information.
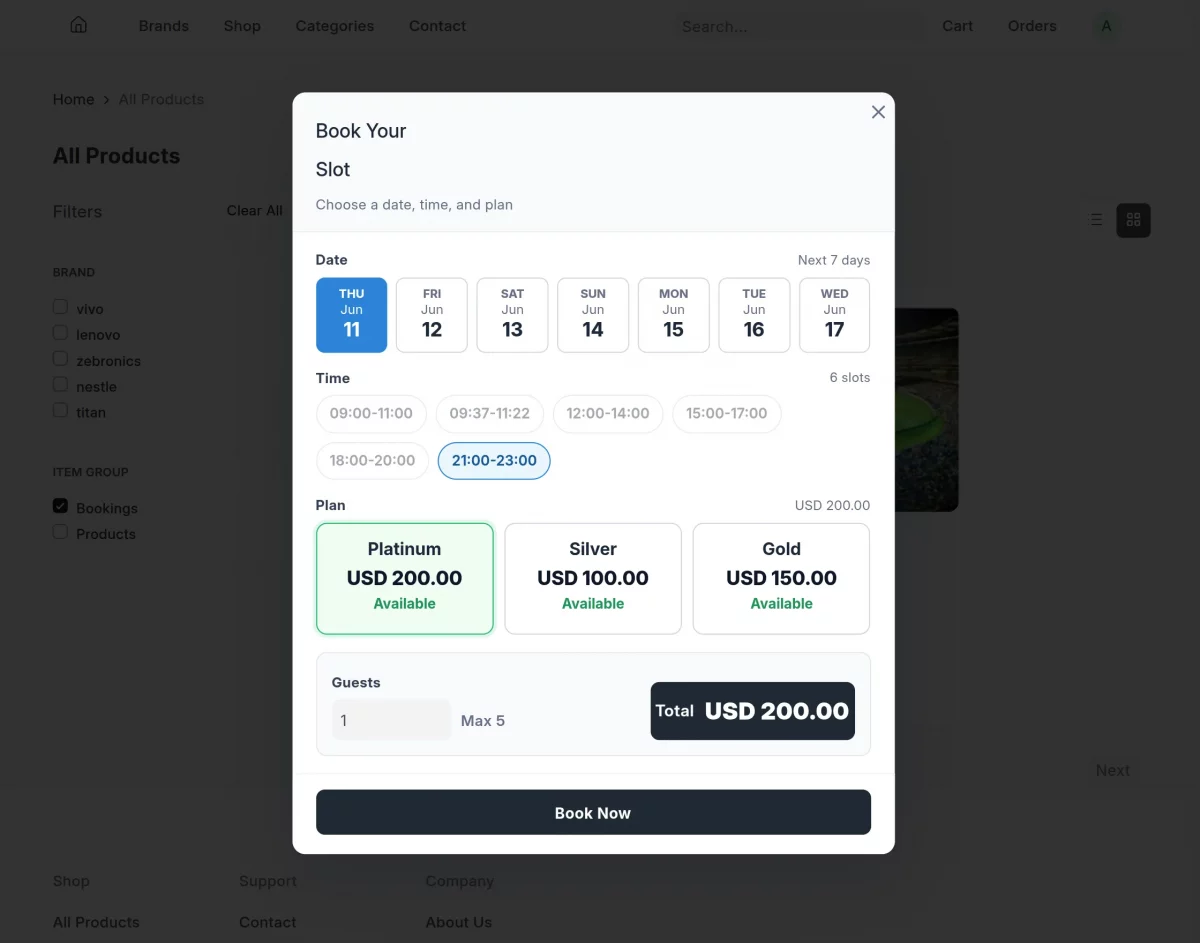
3. Then click Book now. A pop-up window will appear where you need to select the reservation date, time slot, reservation planand the number of reservations. After filling in the required information, click Book now to proceed with your reservation.
4. After clicking Book nowthe selected reservation will be added to your basket. From there you can choose your favorite payment methodapply any available couponthen click Place order to finalize your reservation.
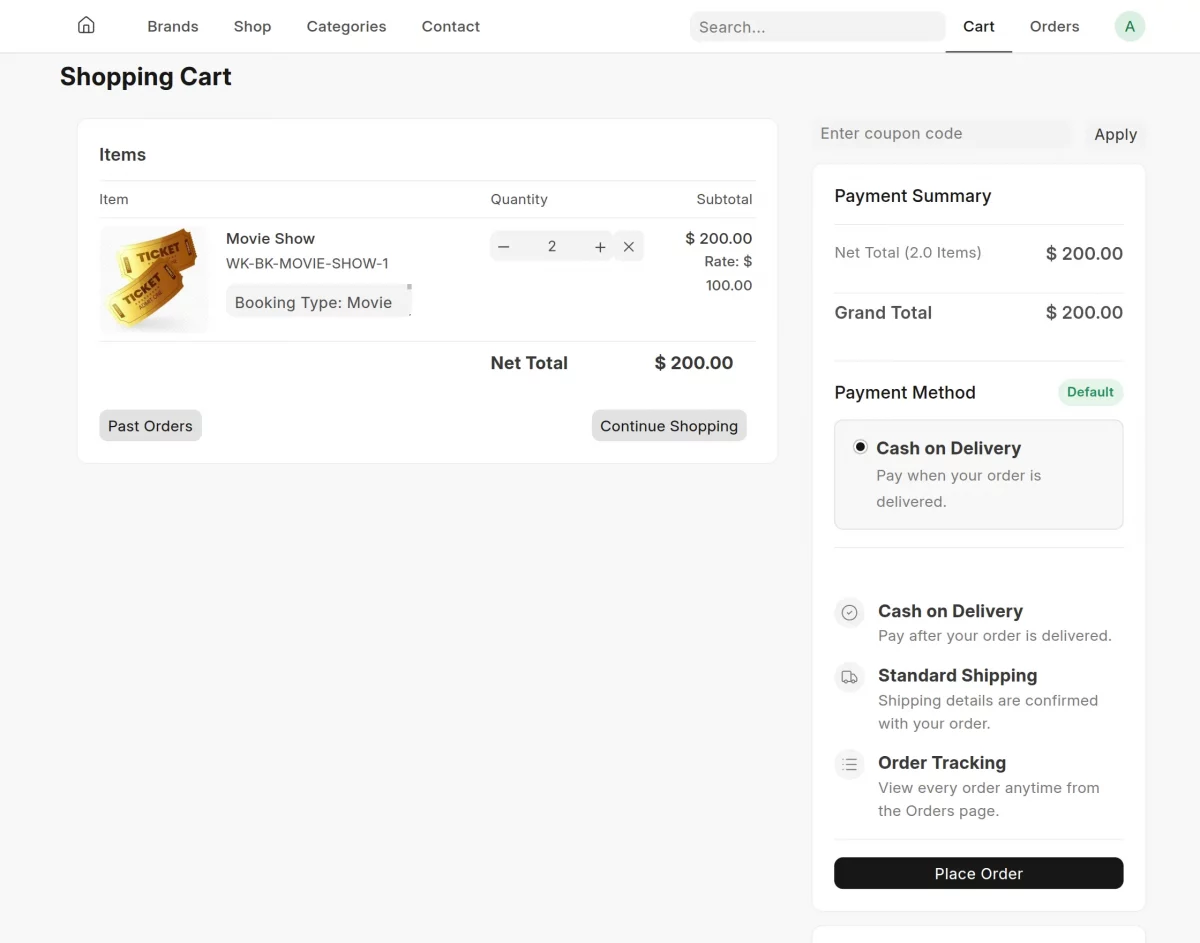
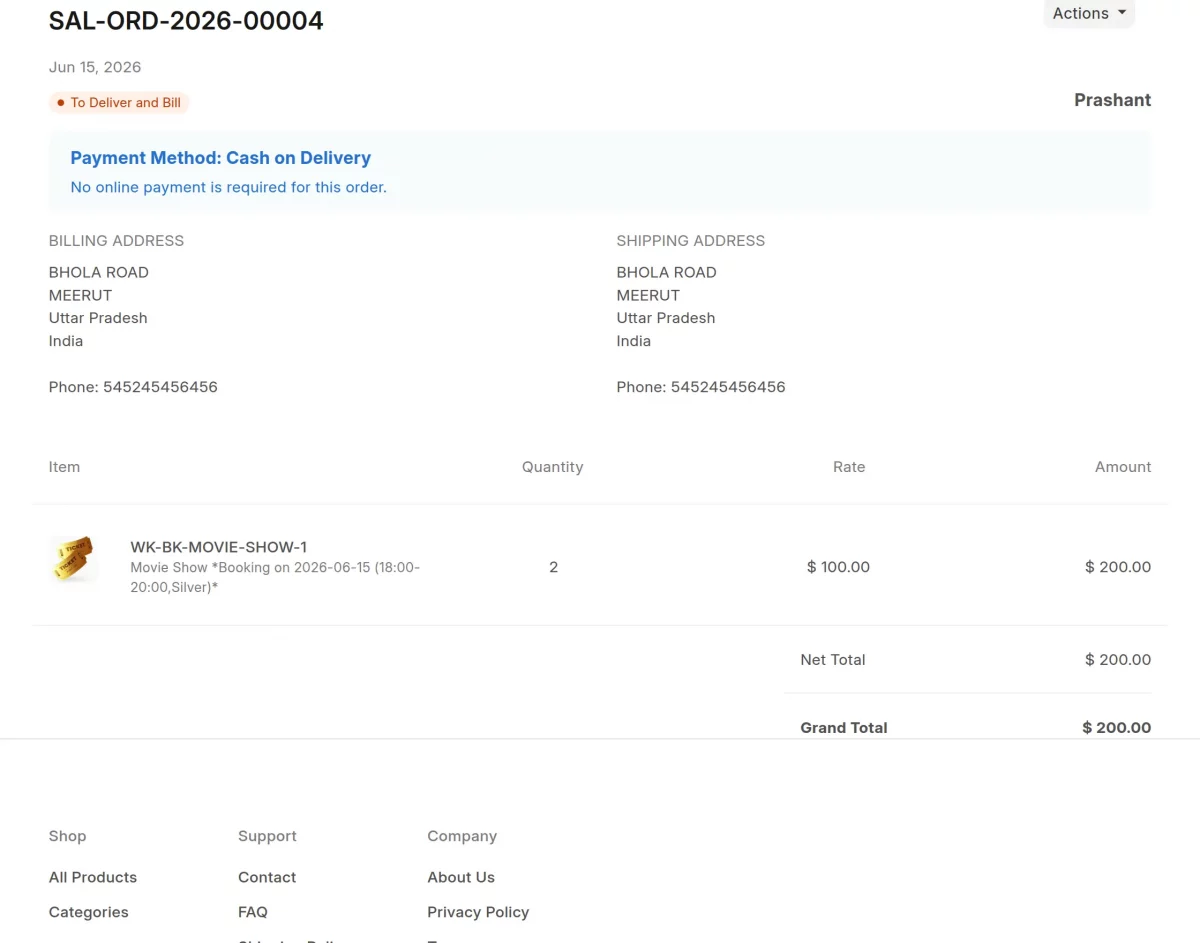
5. After clicking Place orderthe order will be placed successfully and the final invoice will be generated. The invoice will include all booking details, such as the selected booking plan, date, time slot, quantity, price and payment information.
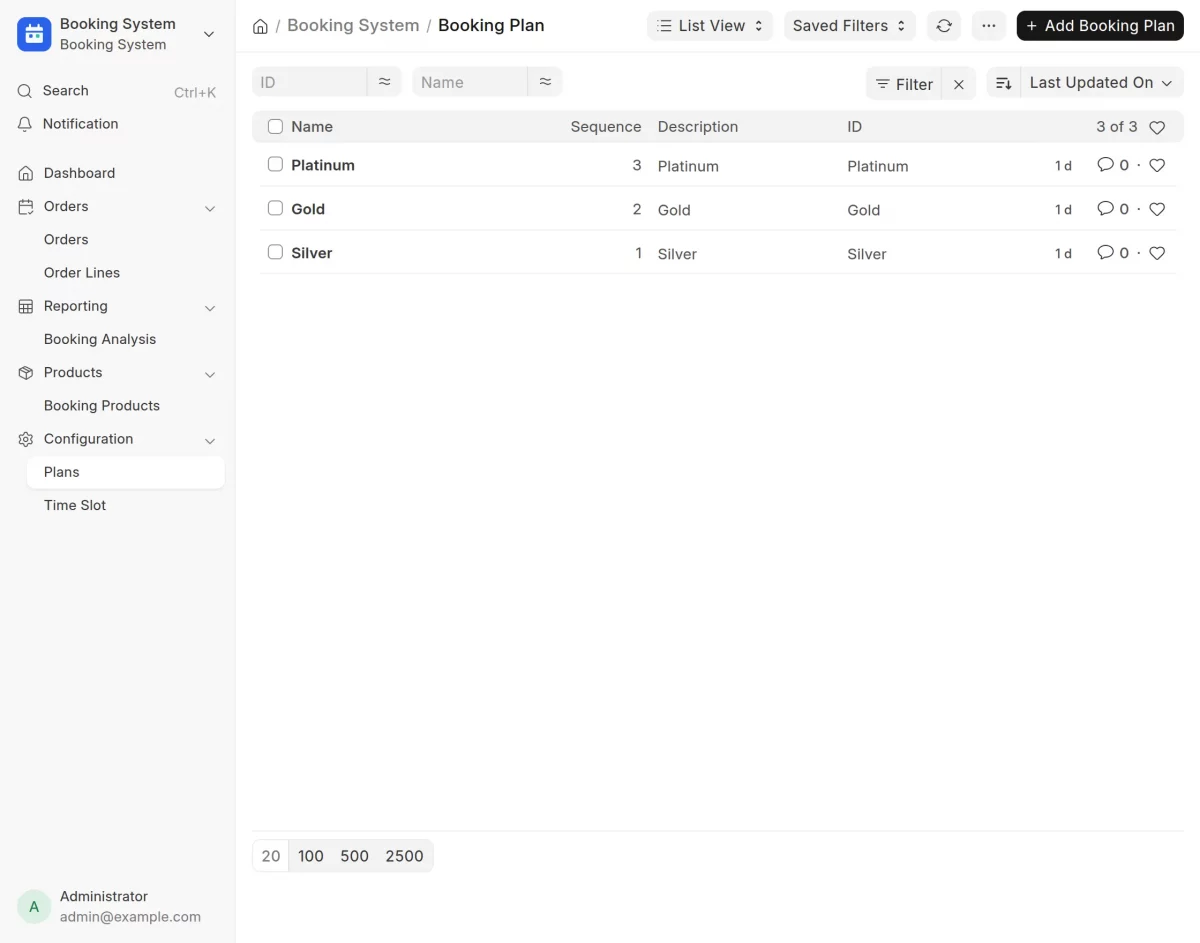
1. To manage booking packages, click Packages under the Configuration section on the main dashboard. This will open the List of reservation planswhere you can view all existing booking plans or click Add a booking plan to create a new one.
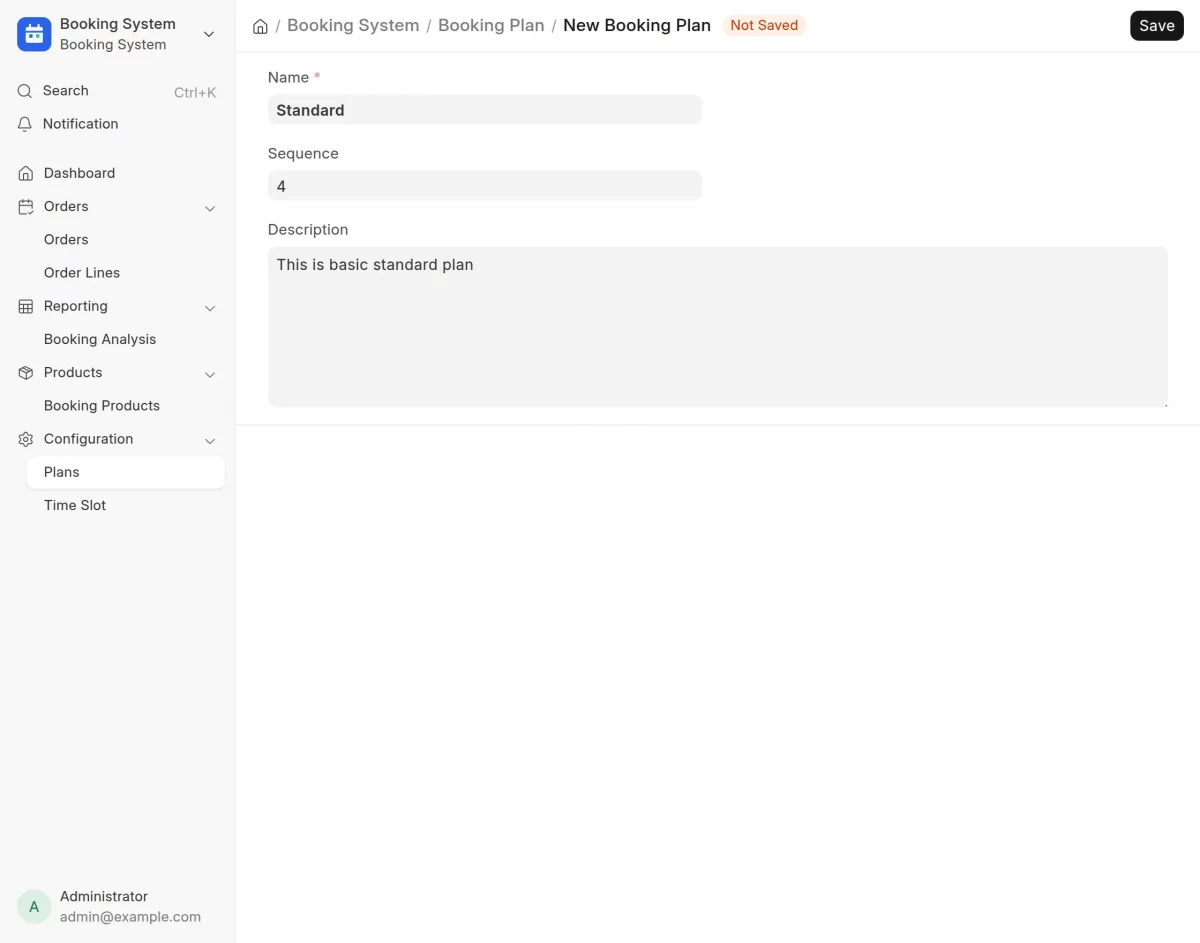
2. Click Add a booking plan to create a new booking plan. A new form will open in which you must enter the Plan name, Sequence (to define the display order), and a Description of the plan. After filling in the required information, click To safeguard to create the reservation plan.
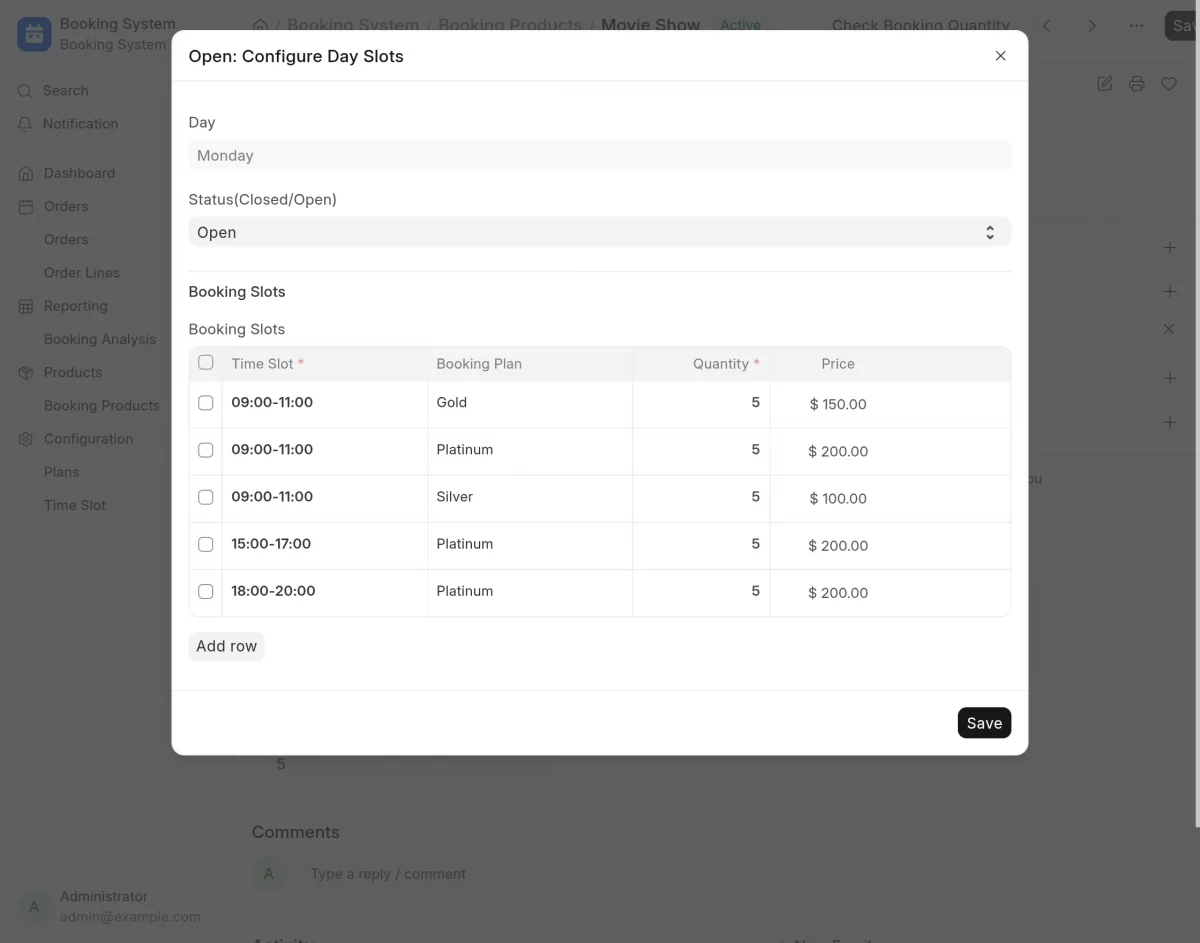
3. After setting up booking plans, click Time slot to manage available reservation slots. Here you can create and configure time slots according to the needs of your business by clicking on Add a time slot.
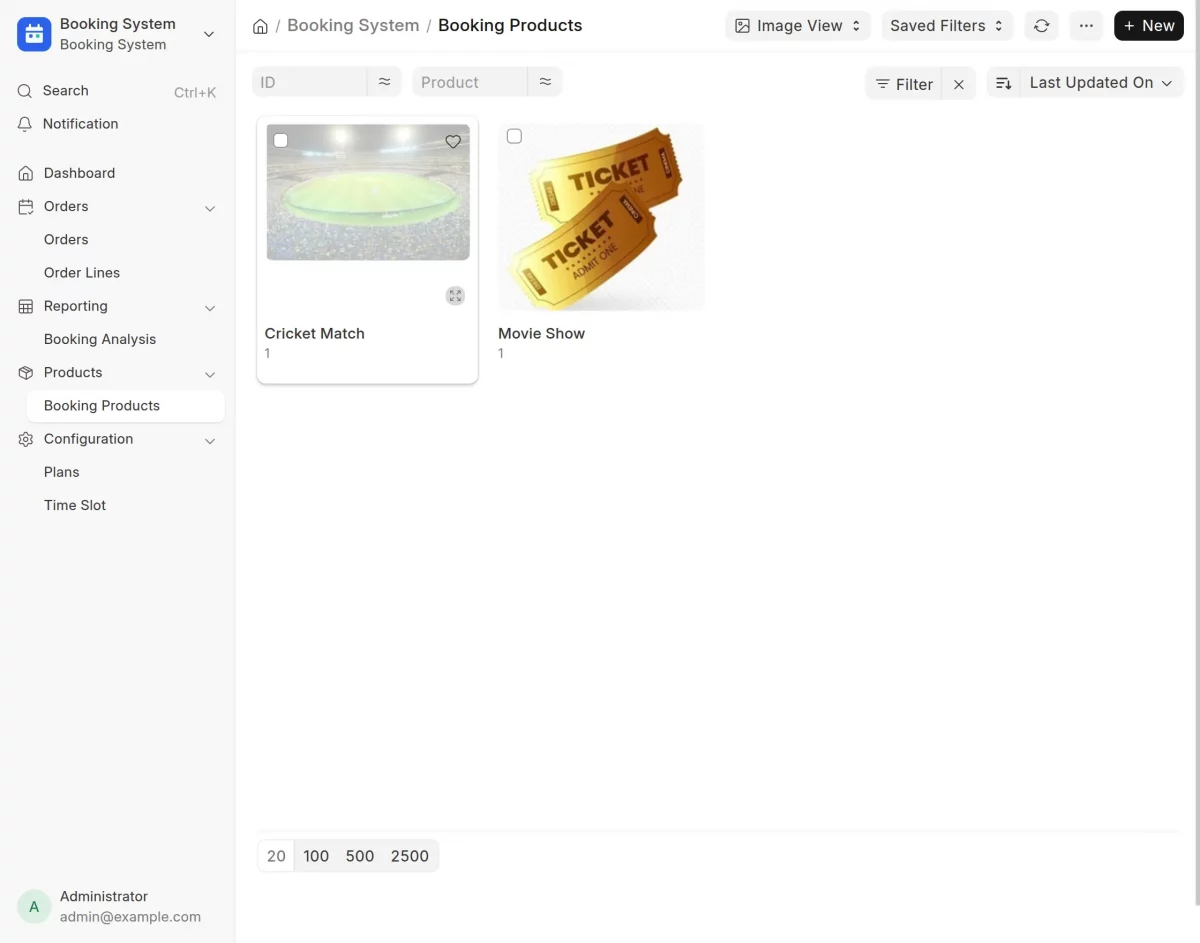
4. After configuring the Time slotsclick on Reservation products to open the List of reservation products. Here you can view all existing booking products or click New to create a new reservation product.
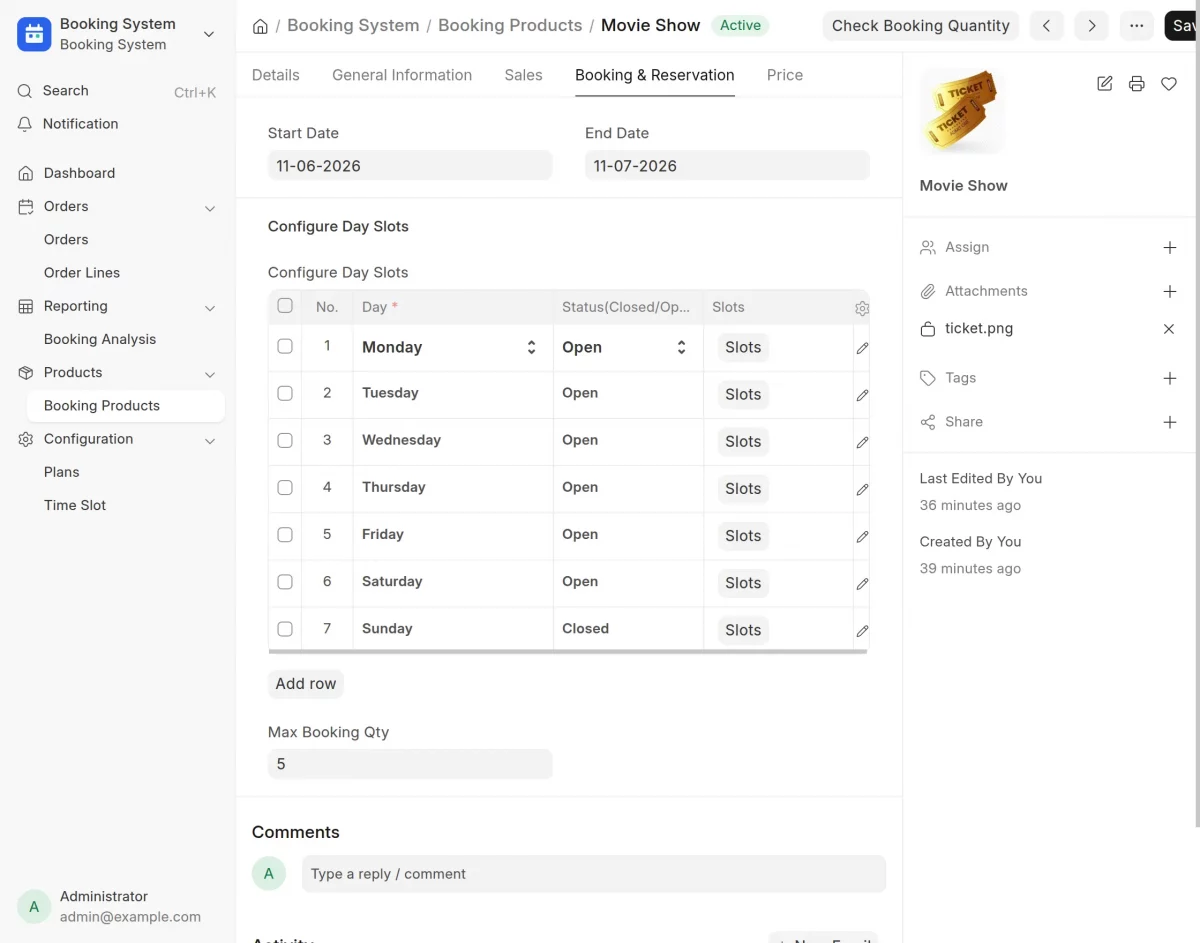
5. Click on a Booking product to view and manage its details. Then open it Reservation & Reservation section, where you can configure the Start date, End date, Time slots availableand the Reservation quantity according to your requirements.
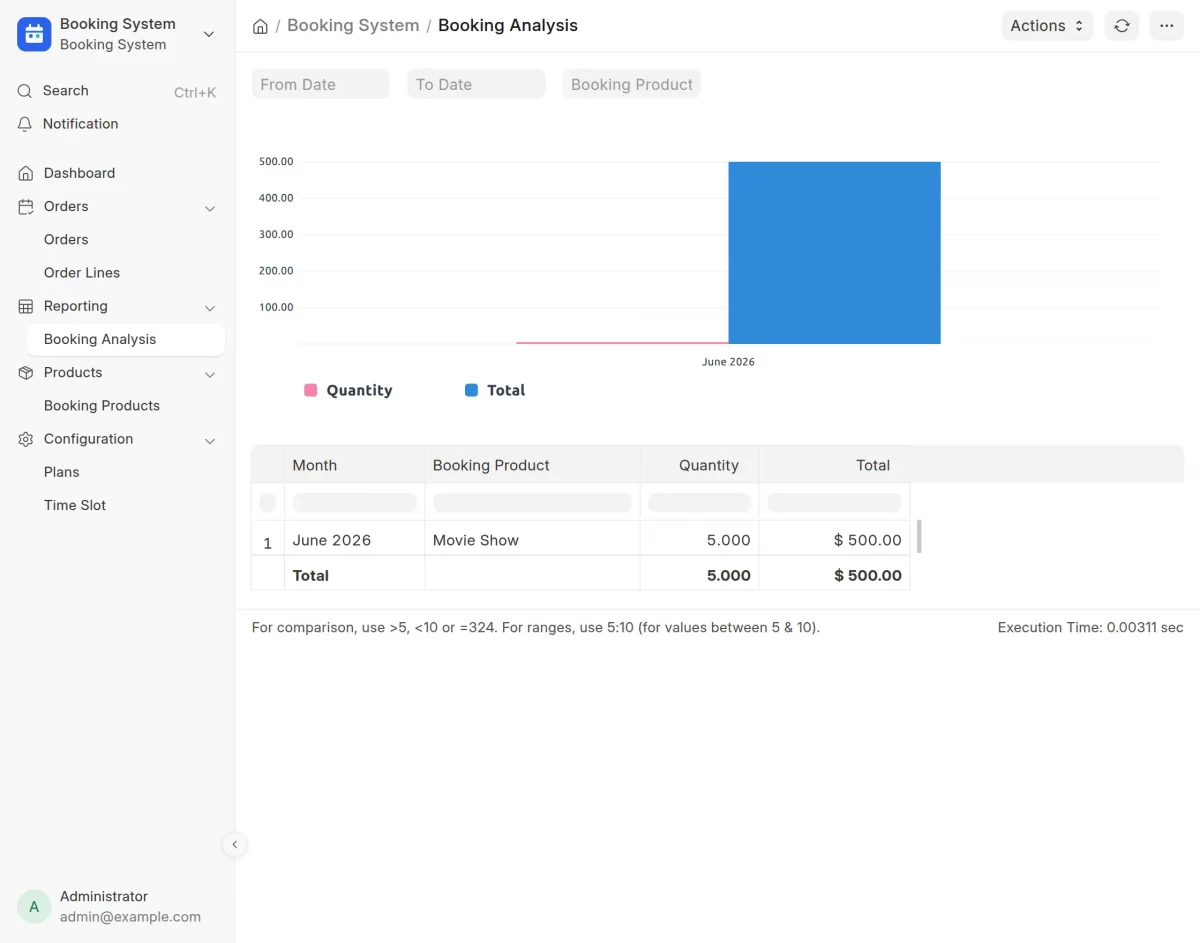
6. To view booking performance, click Reservations analysis from the main dashboard. This page displays booking statistics via graphics And reportshelping you analyze booking trends and monitor overall booking activity.
7. To view all reservation orders, click Orders from the main dashboard. This will open the Order listwhere you can view and manage all booking orders created through the website.
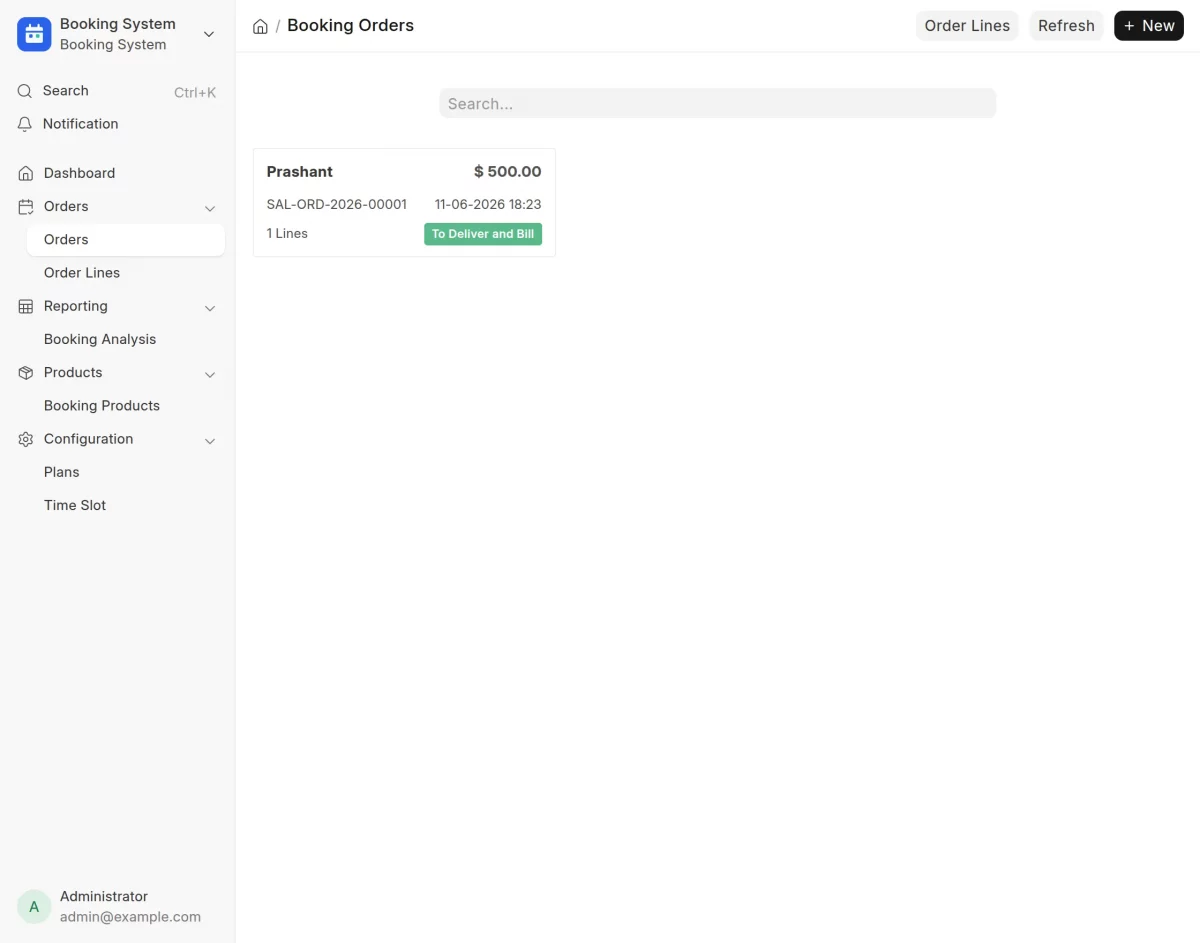
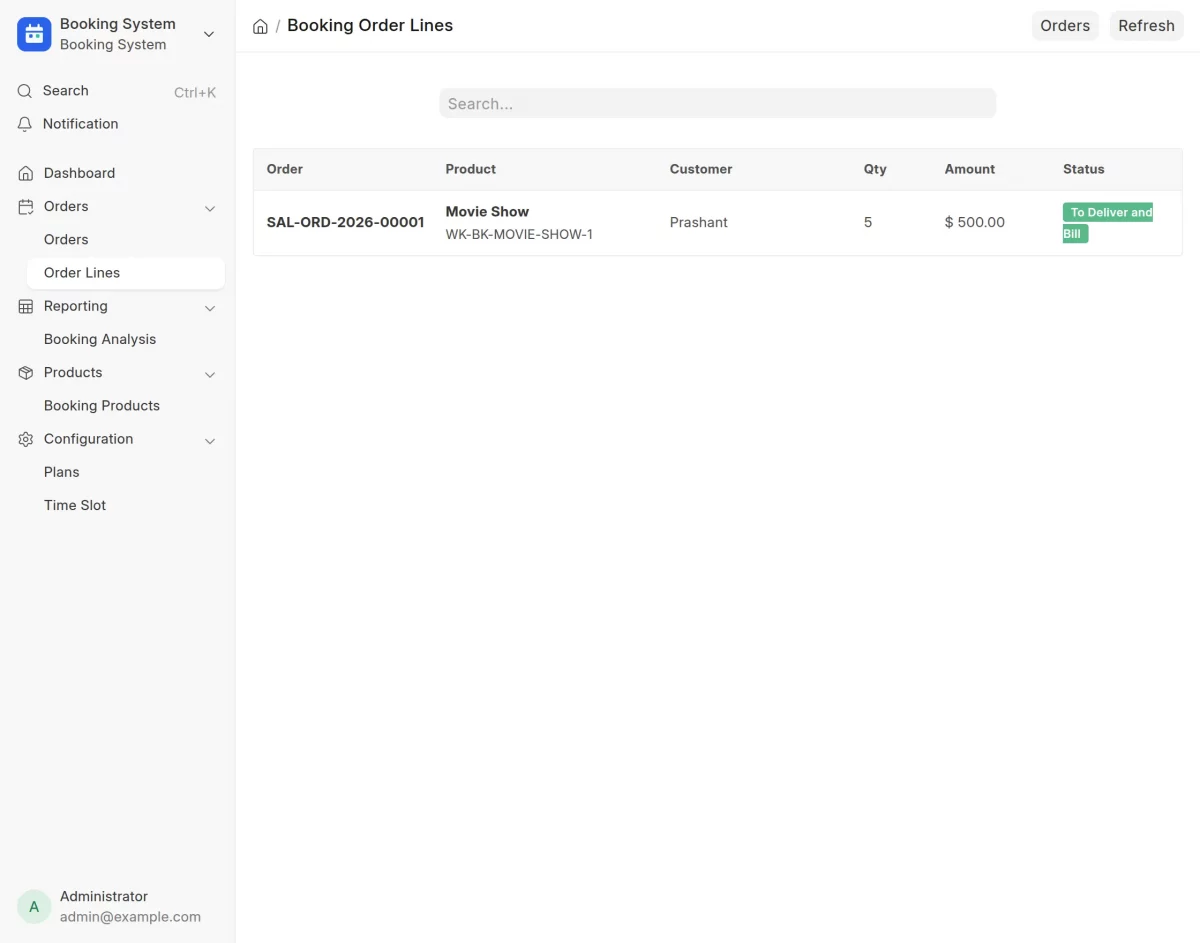
8. To display the Customer orders created for reservations, click Order lines from the main dashboard. This will open the List of command lineswhere you can view all sales order records related to record orders.
I hope you find the guide useful! Please feel free to share your thoughts in the comments below.
If you still have issues/questions, please create a ticket at the UV Desk.
Hope this helps. If you have additional questions, contact us via our support email.
Thank you for your attention!!
Current product version – 0.0.1
Supported framework version – ERPNext V16

PakarPBN
A Private Blog Network (PBN) is a collection of websites that are controlled by a single individual or organization and used primarily to build backlinks to a “money site” in order to influence its ranking in search engines such as Google. The core idea behind a PBN is based on the importance of backlinks in Google’s ranking algorithm. Since Google views backlinks as signals of authority and trust, some website owners attempt to artificially create these signals through a controlled network of sites.
In a typical PBN setup, the owner acquires expired or aged domains that already have existing authority, backlinks, and history. These domains are rebuilt with new content and hosted separately, often using different IP addresses, hosting providers, themes, and ownership details to make them appear unrelated. Within the content published on these sites, links are strategically placed that point to the main website the owner wants to rank higher. By doing this, the owner attempts to pass link equity (also known as “link juice”) from the PBN sites to the target website.
The purpose of a PBN is to give the impression that the target website is naturally earning links from multiple independent sources. If done effectively, this can temporarily improve keyword rankings, increase organic visibility, and drive more traffic from search results.
Comments are closed, but trackbacks and pingbacks are open.